
Overview: Website Builder (CMS)
In this article, we will introduce the layout of the Website Builder (CMS) and provide details on several of the key menus and features, including links to further information.
Table of contents
Video
This video was recorded in the old UI. We will update this video soon.
Top navigation

Let's start at the left side of the top navigation. Here we have the burger menu which we will talk about in detail in the next section. That's why we move on to the left-arrow icon that allows you to Undo (Ctrl + Z) changes and the right-arrow icon which allows you to Redo (Ctrl + Y) changes.
When you click on the eye icon (or use Ctrl + P) you can preview your website within the website editor - that's why we call it the preview icon. This preview feature within the website editor allows you to check and test changes that have not yet been saved. if you hover over the preview icon you will see a dropdown with additional preview options:

- Preview: The preview mode within the website editor - no saving necessary.
- Open preview website: This will open your website in a new tab. If you would like to check and test changes you should hit save (or use Ctrl + S) before opening the preview website since it only shows you the latest saved website version.
- Presentation mode: Here you will see your website on desktop, tablet, and mobile view at the same time to get a quick overview of how your website looks and behaves on different viewports.
- Share presentation link: This is the link to the presentation mode.
- Link to feedback tool: Here you will find the link to the feedback tool that your customers can use to add on-page comments directly to specific website elements. This is a real game-changer that will improve the feedback process with your customers.
Next up we have the reload option which will reload your website. Please make sure to save any changes if you want to keep them since the reload will reset your website to the latest saved version.
Next to reload you will find the save icon (Ctrl + S). This icon turns orange if changes on the website were made. If your website is already published all changes that you save will directly be pushed to the live site.
In the middle of the top navigation, you can choose between a desktop, tablet, and mobile view to check your website across all devices and adjust the responsive settings if needed.

If you hover over a viewport you will find different predefined devices to check your website on different resolutions. Using the percentage dropdown you can also determine which zoom factor should be used and if you would like to fix the zoom factor you can do this by clicking on the lock - otherwise, the zoom will be adjusted depending on the chosen device.
Under Design, you will find all global settings of the website like the color scheme, fonts, and button design which will affect the whole website and thus make sure that you have a consistent style and design across your website even if you decide to change it later. You can overwrite these design settings in the settings panels of the individual elements and presets.
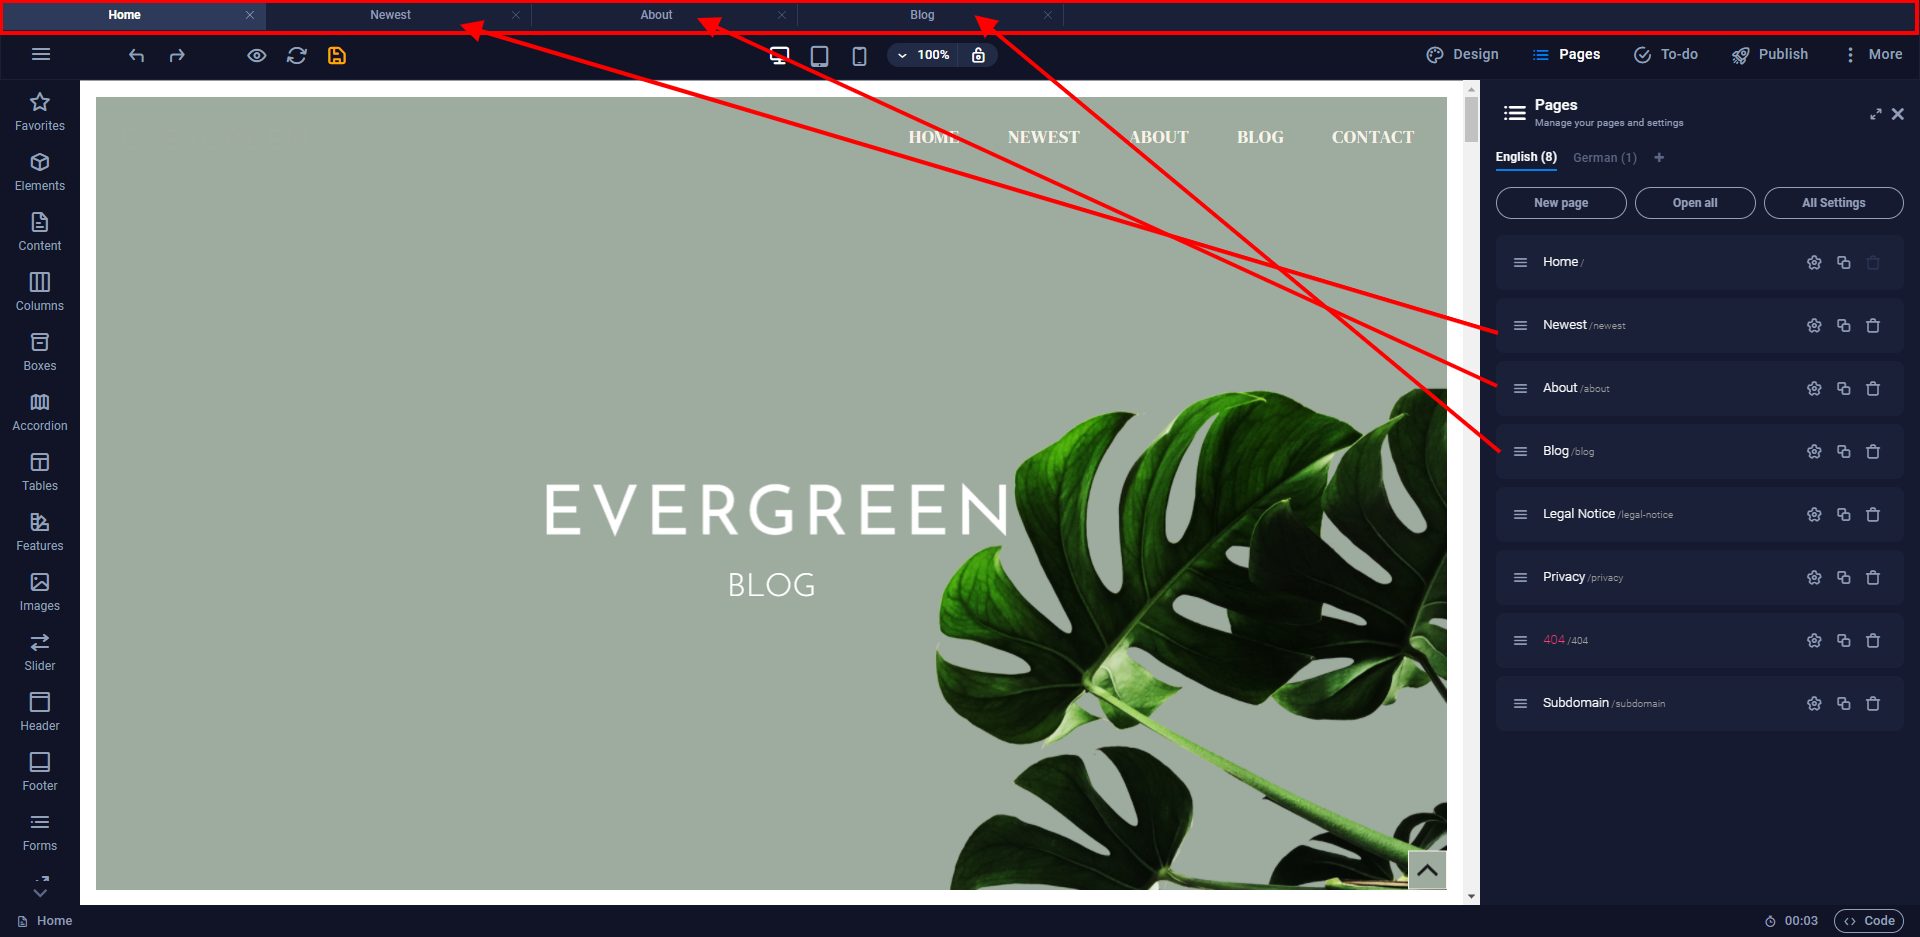
Under Pages, you will find all subpages of a website. You can add new subpages, edit URLs and page names, add site-specific meta information, secure a subpage with a password and determine if a subpage should be listed by search engines. Each subpage will be opened as a tab above the top navigation.
Under To-do, you can add global To-dos or reminders or you can add on-page To-dos that can be connected to specific website elements. This makes it easy to manage the feedback process with your customers - which have a similar version of the To-do feature in the customer portal called feedback tool - but it also simplifies the audit and feedback process with your team e.g. if you check each other's websites. How to use the To-do feature in the website editor and in the customer portal will be explained in detail here.
If your website isn't published yet, you will also see a Publish button in the top navigation. This will redirect you to the domain manager of a website where you can add and manage the domains of your website to publish the website.
Last but not least, we have the More menu which we will look at in more detail below.
Burger menu
Under the burger menu you will find the following important features:

- Redirections: Here you can add three different types of redirections: 301, 302, and 410.
- Backups: Here you will find all backups that the system automatically saves every 5-10 minutes during an active session in the website editor. You can also create your own manual backups.
- Website Export: Here you can export your website as a ZIP file.
- Preferences: Here you can set up your preferences when using the website editor. You can e.g. change the language of the editor, you can decide if the panels should close when you save the website or whether only the start page or all subpages should be created when adding a new language.
- Help: Here you have direct access to all our help resources.
- Shortcuts: Use the implemented shortcuts to be more efficient when creating your website. You can use common shortcuts like Ctrl + C and Ctrl + V to copy and paste elements, but we also have shortcuts to easily add new elements, e.g. when using Ctrl + 2 you will add a new text element. To open the shortcuts overview you can also use a shortcut: Ctrl + K. For Mac users these shortcuts can be used with the equivalent keys.
Content Sidebar
The content sidebar on the left is segmented into different categories that make it easy to add new content to your website. In the content sidebar, we distinguish between elements which are individual components like headlines, texts, or images, and presets which are pre-built website sections that consist of different elements. Examples for presets are accordions, image galleries, or pricing tables. Elements are displayed with icons (examples are in the red box) and presets (orange box) are displayed with thumbnails that give you a preview of the website section:

In some categories like "Forms", you will find presets and form elements. Here you can also make use of the distinction mentioned above - form elements are displayed with icons, presets are displayed with thumbnails. When working with forms we highly recommend starting with a form preset which you can adapt to your needs by adding or deleting form elements. More information about forms can be found here.
To add presets and elements to your website you can simply drag and drop them to your preferred position.
More menu
Under More you will find some more helpful features:

- Website Settings: Here you can change the logo globally for the website and add a favicon and preview image of the website.
- Data: Manage the contact and customer data for this website in one place and use data bindings across the website so that changes are managed from one place but will affect the whole website.
- SEO: Add meta information for the website or code snippets that should be placed in the <head>.
- Languages: Activate different languages to display a multilanguage website.
- Collections Manager: Create and manage dynamic content like blogs.
- Files: Use the file manager to upload and manage images, files, and other content needed for the website.
- Content Import: If you want to use files, images, and content from an old website, you can simply use this feature to import the content directly to your website.
- Fonts: Manage the fonts that should be loaded for this website. You can select from available fonts or upload custom fonts.
- Wishes: Here you will see all information and requirements that your customers have uploaded under Wishes in their customer portal.
Footer with breadcrumb, timer, and code editor
In the footer, you will find the breadcrumb which shows you the hierarchy of containers and elements so you get an overview of how different containers, presets, and elements are nested. In other words: within the breadcrumbs, each element and its parent containers are listed together with all CSS classes used. Preset containers show the color palette icon, containers with a background show an image icon, animations are indicated by a star icon, linked elements have a link icon, and elements that are part of a collection show a database icon. Just double click on these symbols or the container name and the corresponding settings will be opened.
As you can see in this image we clicked on a button element that is nested into a container which is part of the 3 columns preset, etc.:

You can also use the arrow keys to jump from one element to the next and thus also go through the different hierarchies. This is especially helpful if you have a lot of nested elements that are hard to reach.
On the right side of the footer, you can see a timer that shows how long you have been in the CMS during this session. With status management and time tracking, you always have an overview of the time that has already been spent working on a project. Next to the timer, you will find the code button which allows you to access the website's code, including CSS, JavaScript, and HTML. Here you can view or edit the project code, including code for presets, or write your own code.
WYSIWYG Editor
The middle section is Sitejet's WYSIWYG editor. WYSIWYG stands for "what you see is what you get". Double-click on any element while in the editor and its settings will be displayed in a panel on the left side of the screen. The preferences can be accessed through a puzzle piece icon that appears to the left of an element when you hover over it. If you click on it, the window with the default settings will open.
Right-click an element to open the context menu. There are options for editing the item, cropping, copying, pasting, adding and deleting items, and more. The context menu provides links for editing and the option to make it "Editable for Customers". With this feature, you can make it so that certain parts of the page can be edited by your customers from their customer portal. Here you have the possibility to share only this element, all elements of this kind on the page, or all elements on the page.
Become a part of our Community!
Exchange ideas with other web designers about current developments, tips, and tricks and show your favorite sites. Get advice and talk to us about possible features you would like to see on Sitejet. You can join the Sitejetters community here.
